

How to make a Chinese Xun
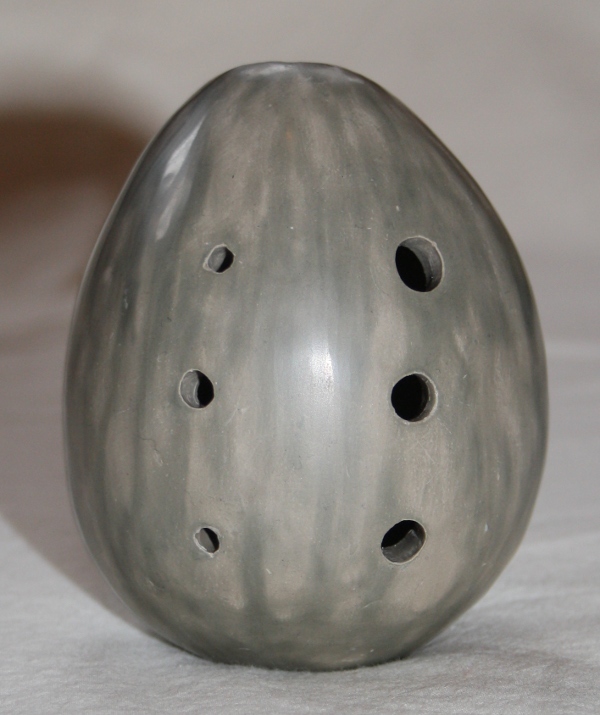
The Xun—pronounced shoon—is an ocarina-like instrument of Chinese origin. They are technically similar to ocarinas being an air-reed vessel flute, but they lack a windway. Instead, they are blown by the lips, similar to a transverse flute.
Due to their lack of a windway, Xuns are easier to make than ocarinas. The tricky aspects of ocarina making, such as slot stick creation and labium alignment do not exist with the Xun.
This tutorial assumes that you have a basic understanding of the physical process by which air reed instruments operate, the basics of clay work and the tuning of vessel flutes. If you do not, these topics are covered in my book, The Art of Ocarina Making.
As there is very little information about the Xun online in English, this guide is based on my interpretation of the instrument. The methods described here may well vary from the traditional process. Xun's may be created using a number of techniques:
- by creating a form, cutting, and hollowing it out
- by creating and joining two pinch pots
- by throwing the form with a potters wheel
- By creating and using a plaster mold
This tutorial demonstrates the first method, of forming the shape, hollowing it, before joining it again.
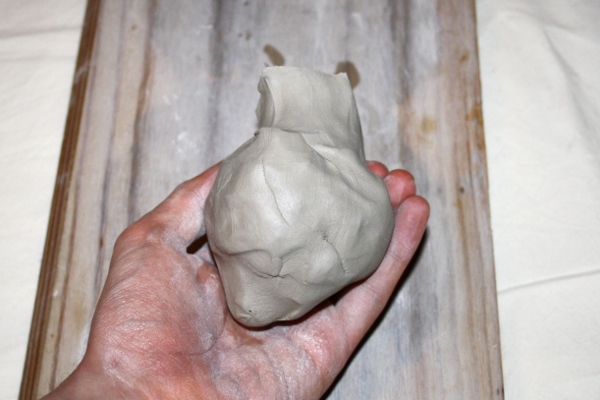
Step 1
To start with, grab yourself a lump of clay the size of a decent apple. You should use a smooth (ungrogged) earthenware clay, although a smooth stoneware clay will work, at the cost of higher shrinkage.
If you are just starting out and have no firing arrangements, don't worry. Xuns can be played in an unfired state.
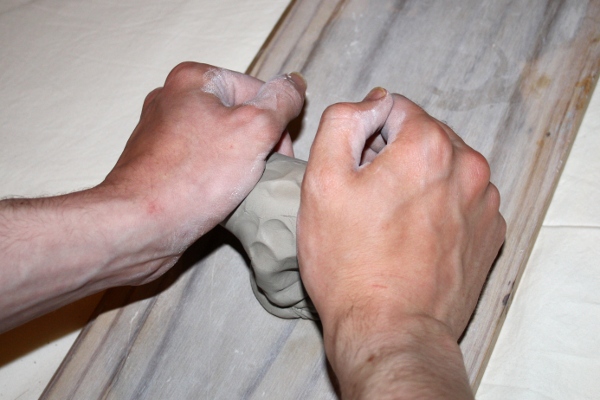
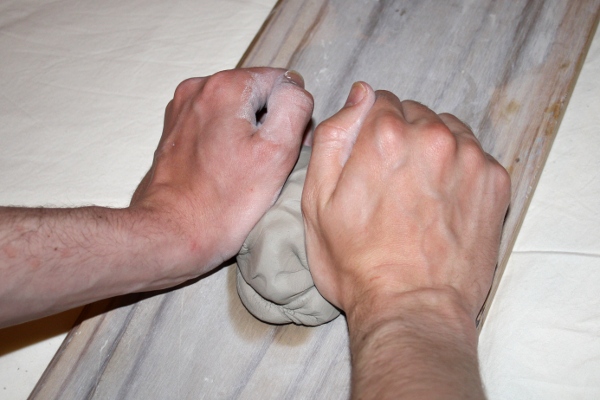
Step 2
After it has been stored for a period of time the water content of clay loses its uniformity, which makes the clay difficult to work with. Fresh clay may also contain air pockets which can cause the work to explode when fired. You may avoid both of these problems by thoroughly wedging your clay before use. There are several methods to wedge clay including 'cut and slap', 'cylinder' and 'spiral'. The cylinder method is shown below.
Start with a clay ball and place your hands above it. Force your hands together, down into the lump and away from your body. Roll the clay back onto its tail and repeat at least 20 times. Keep going until you no longer see air bubbles if you cut the lump in half with a wire.
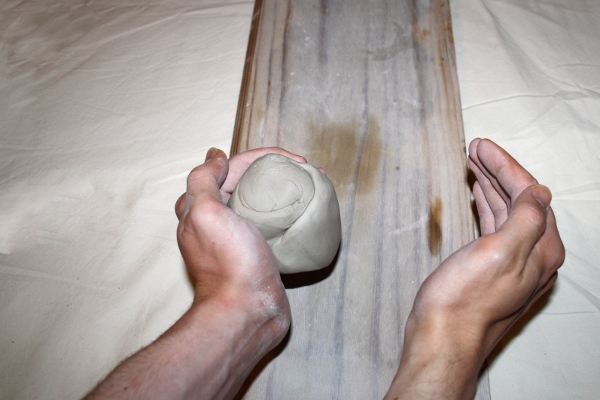
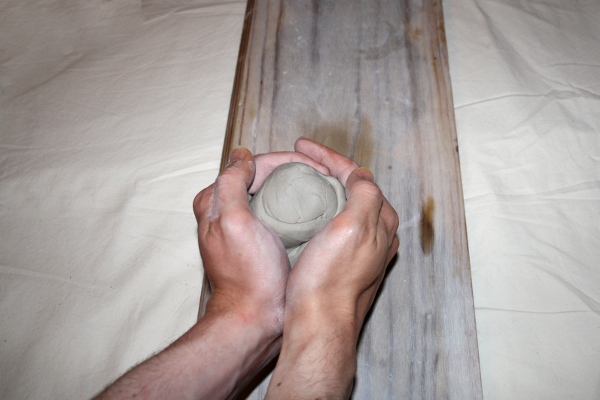
Step 3
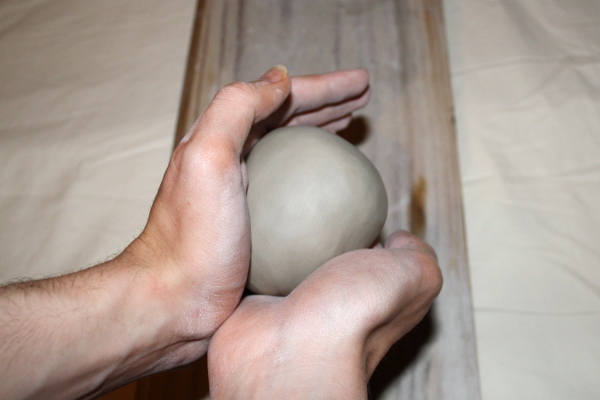
Hold the ball of clay in one hand and slap it with your free hand. As you do so, transfer the ball to this hand, rotating it slightly. Continue slapping the clay, passing it from one hand to the other, until it is balled up and has a smooth surface.
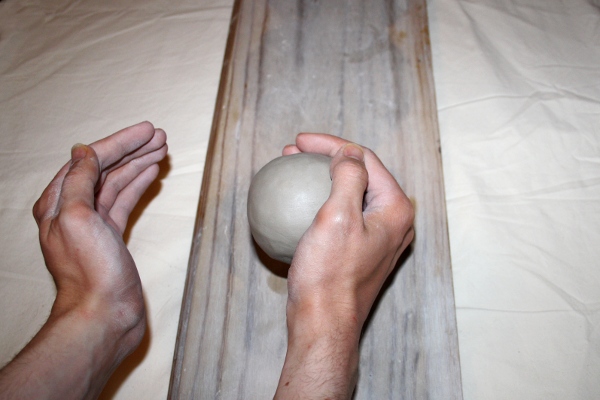
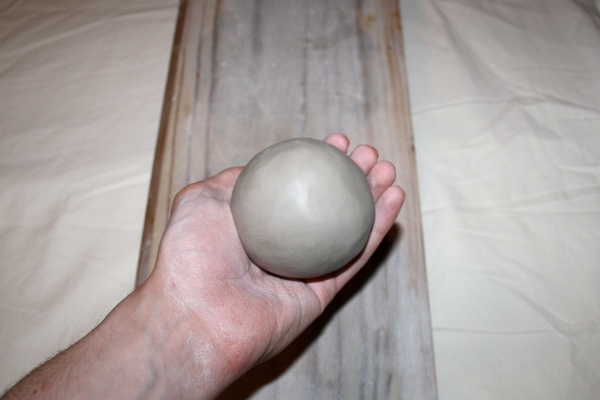
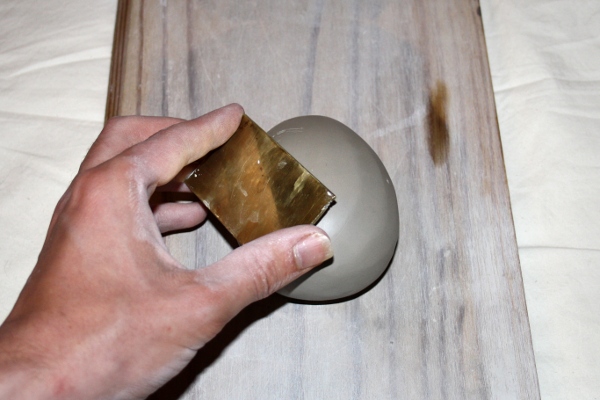
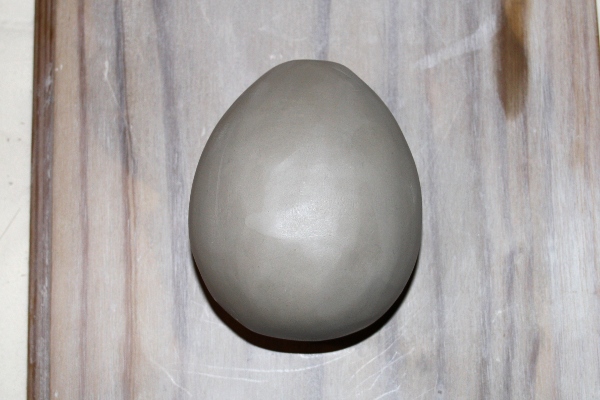
Step 4
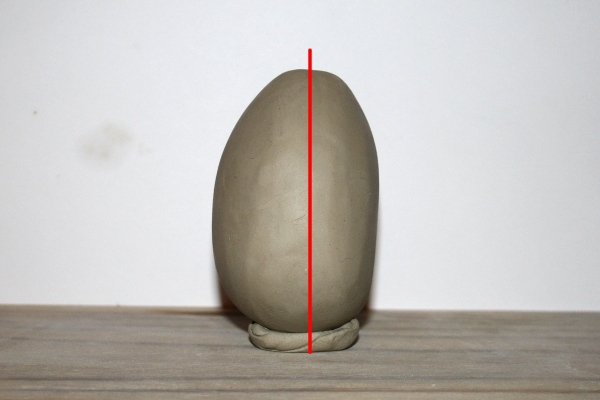
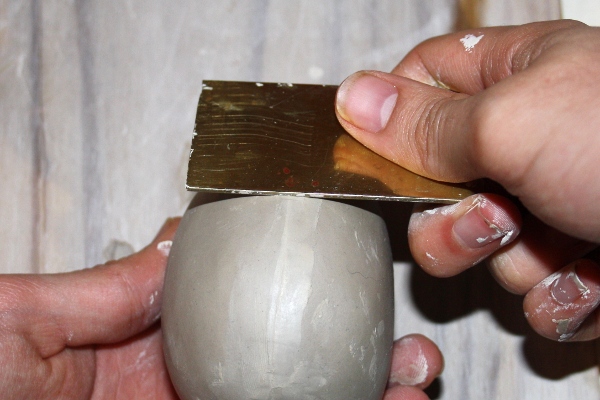
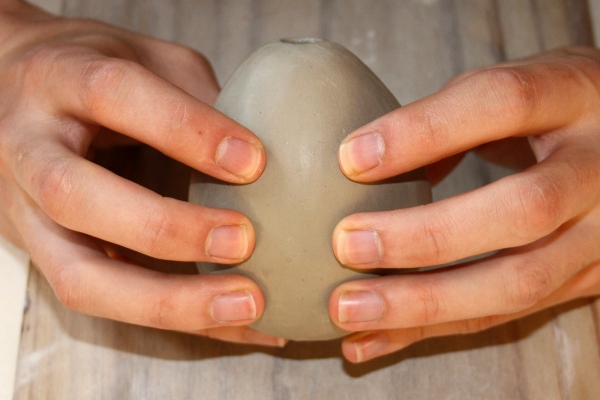
Form the clay ball into an egg shape with your hands. You can refine the shape by smoothing it with a metal plate or kidney tool held at a shallow angle to the clay.
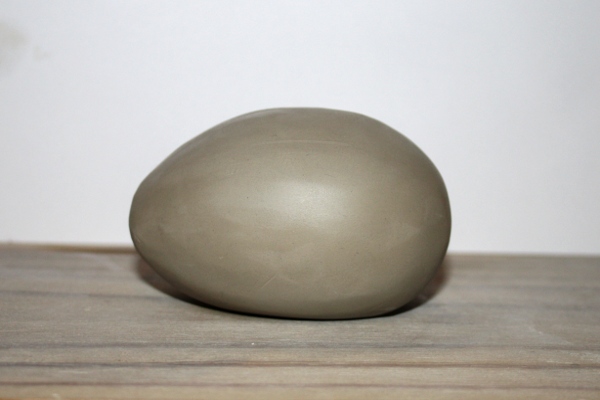
Step 5
Put the form to one side and let it go leather hard, it should be stiff and only move a little when pressed with a finger. Exactly how long this will take depends on the room temperature and humidity, the clays make up and thickness. It can take anywhere from a few hours to more than a day, so do keep an eye on it.
Do not skip this step in an effort to save time, the following steps are difficult to perform with plastic clay as it dents and deforms very easily. Plastic clay will also drag on cutting tools which makes cutting a clean blow hole and labium very difficult.
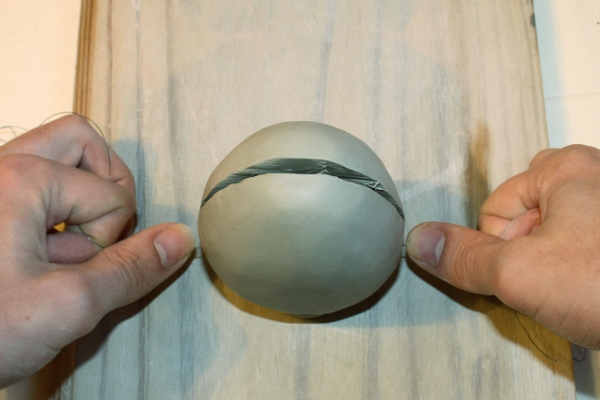
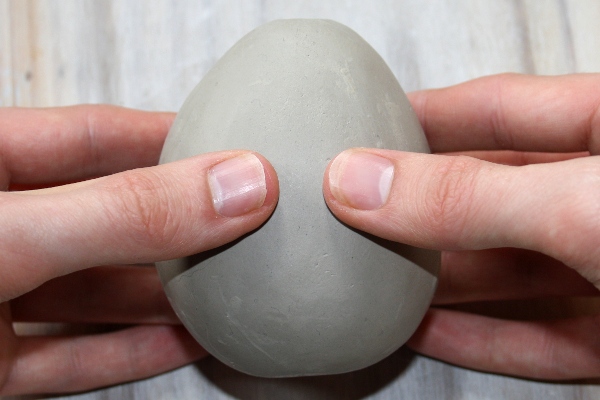
Step 6
Once the clay is leather hard, use a clay cutting wire to cut the form in half. Mount the Xun on your work board with some fresh clay and use a clay cutting wire to cut the form in half down its widest point. This cut should be made in a single action. Avoid creating multiple cuts as they may trap air in the clay, or cause it to crack later.
Step 7
To help you maintain a uniform wall thickness across both halves of the chamber, use a bent out paper-clip to create a guideline. Hold the paper-clip between your thumb and index finger, using your index finger as a guide. Try to avoid repositioning the paper-clip in your hands between marking the two halves of the chamber.
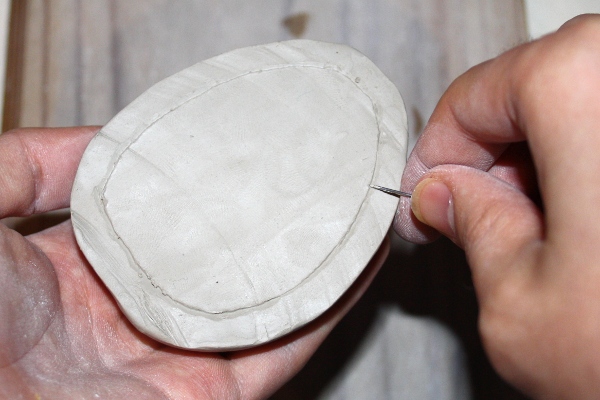
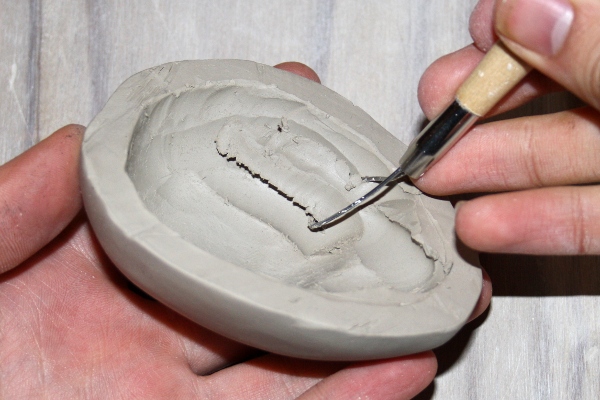
Step 8
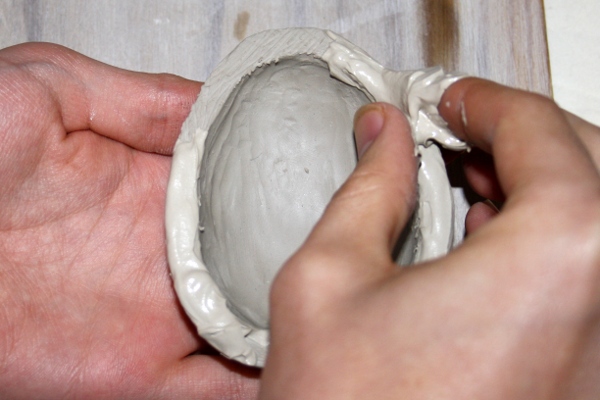
Hollow out the chamber with a wire loop tool. You may use a bought tool, but a paper-clip bent into a scoop works almost as well. Start with heavy cuts to get things moving but as you approach the walls be more careful - you do not want to cut through. Feel the clay between your thumb and index finger to gauge the wall thickness at different points, then use light scraping cuts to make any final adjustments. Do not cut out the blow hole at this stage.
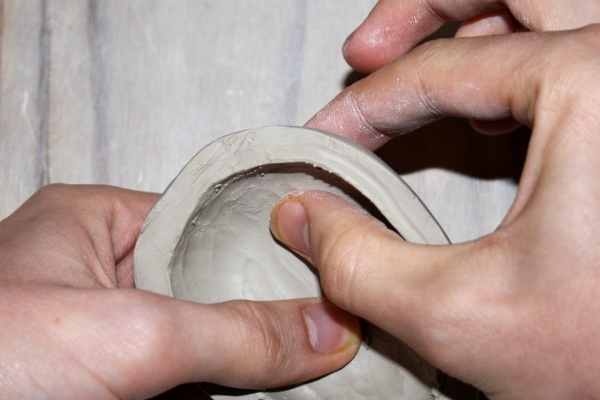
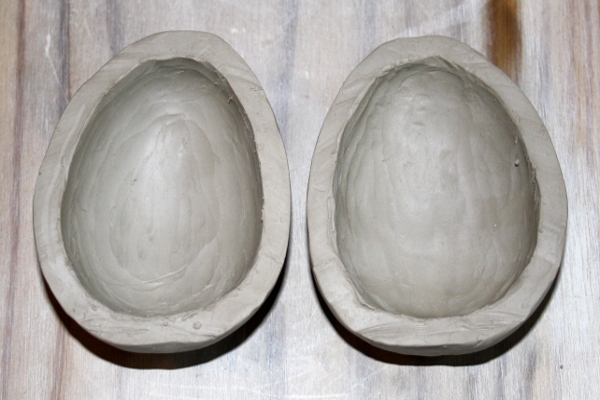
Step 9
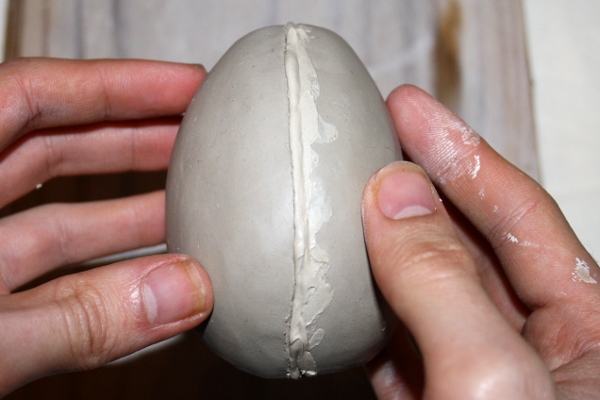
Bring the two halves of the chamber together and correct any misalignments between them. Don't worry about small gaps and variations, they will be filled later.
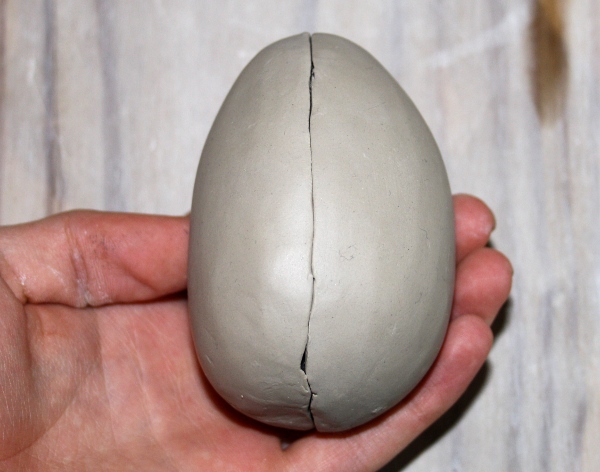
Step 10
On its own, leather hard clay will not readily stick together, to join the two parts slip, a thin watery clay, is used as a glue. You can create slip from your clay by letting some chunks of clay dry fully, then mixing them about 1 to 1 by volume with water. To give the slip something to bind to, heavily score the mating faces of both halves using the corner of a knife, needle tool or similar.
Liberally apply slip to one half of the chamber. Get a big glob of slip on your fingers and smear it onto the clay. You need enough slip to fill any variations, it's better to have too much than not enough.

Step 11
Drill a small 1-2 mm hole where the blow hole will be to let the air out of the chamber, then bring the two halves together. Firstly align the two parts using a slight rubbing motion to help bond the slip, then work around the parameter carefully pressing the join closed. Put it to one side for a few minutes so the slip can dry.
Step 12
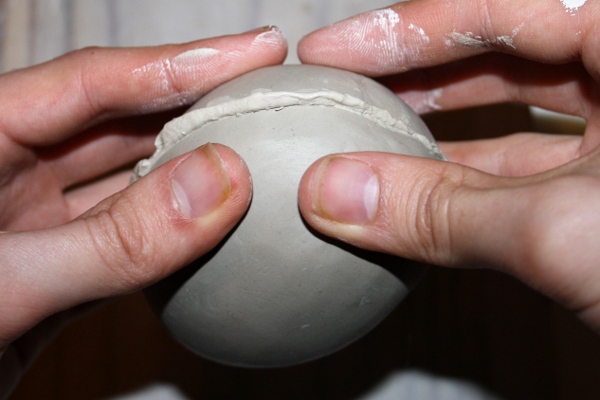
Clear off the excess slip then smooth over the join with a plate or kidney tool.
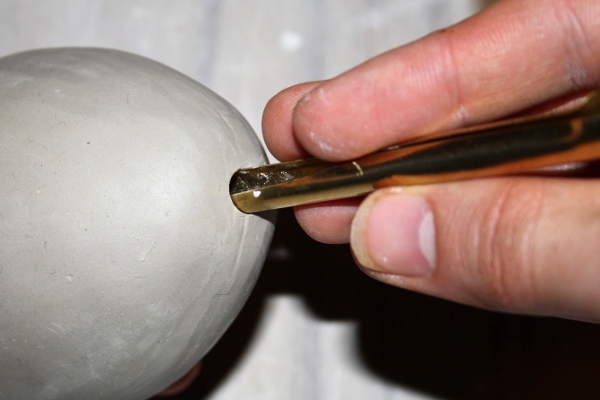
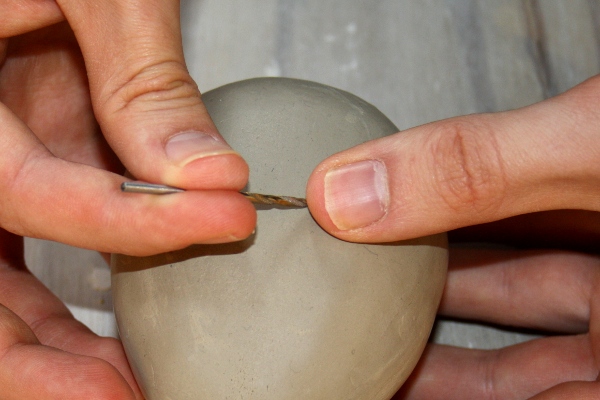
Step 13
Drill out the blow hole, it is best to use a hole cutter for this as they cause little burring inside the hole, however a drill bit will also work. The exact size of this hole depends on the relative volume of the chamber. Start with a small hole around 6 millimeters in size, cut the labium (see next step) then try playing the instrument. If no sound is produced slightly enlarge the hole then try again. Keep enlarging the hole until you get a strong sound, it may be necessary to tweak this when you start tuning.
As a general guideline, a hole between 8 and 11 mm works for instruments around the alto C range.
Step 14
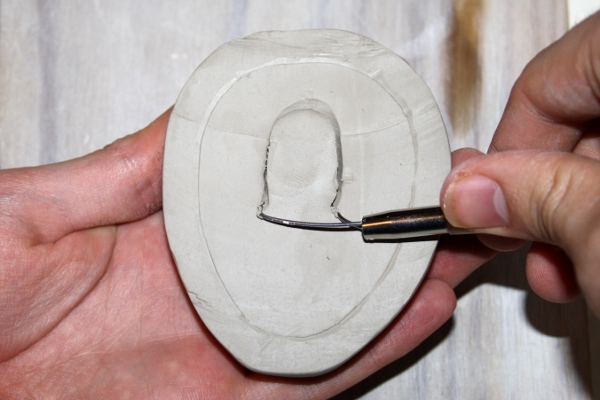
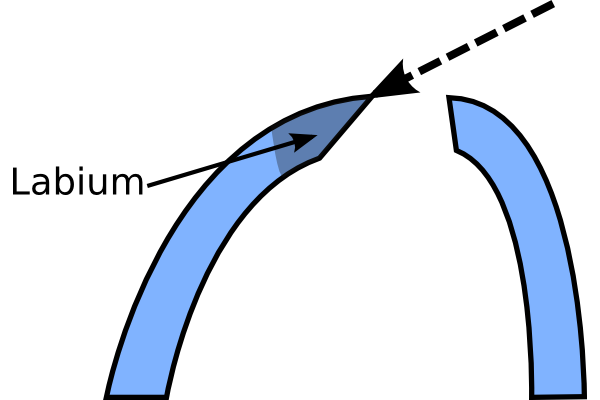
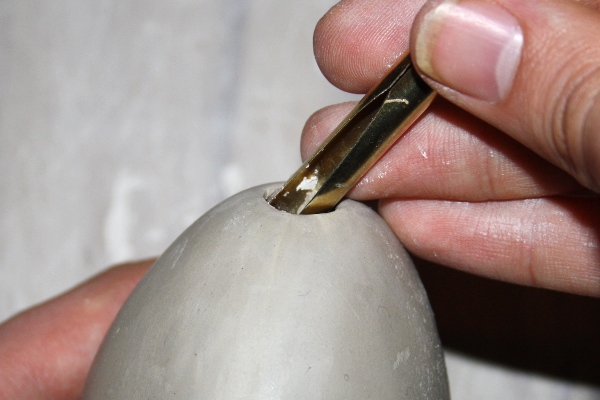
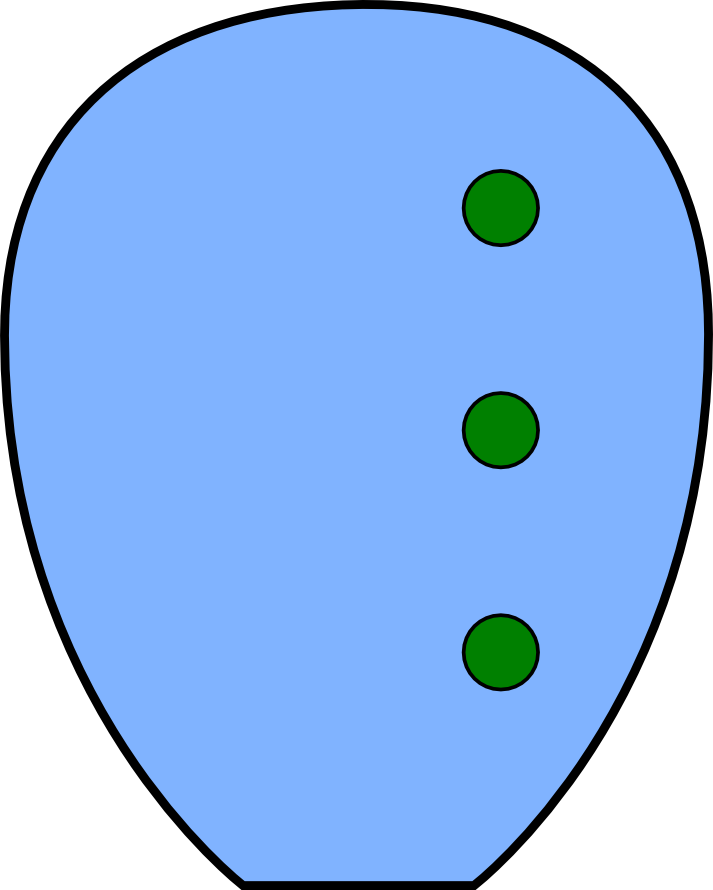
Because the Xun lacks a ducted windway, some people believe that it does not have a labium, which is an incorrect. Unlike ocarinas, where the ramp is clearly visible on the outside of the chamber, the Xun's ramp is inside and the labium edge meats flush with the outside of the chamber. This is shown in the diagram below.
While the instrument may produce a weak tone with a parallel blow hole, much like blowing across the top of a bottle, to play well through its whole range it is necessary to cut a labium edge opposite from where the instrument will be blown. Cut away at the bottom edge of the hole using a small knife or the cutting edge of a hole cutter held at an angle.
To play the instrument, embrasure is important, you need to create a focused air stream directed against the labium edge. Hold the Xun below your lips against your chin, create a small aperture between your lips and smile slightly to flatten the air stream. Angle the air downwards against the labium edge by moving your upper lip forwards. You will need to experiment with the angle of the air, your lip aperture and blowing pressure to get a good tone.
Step 15
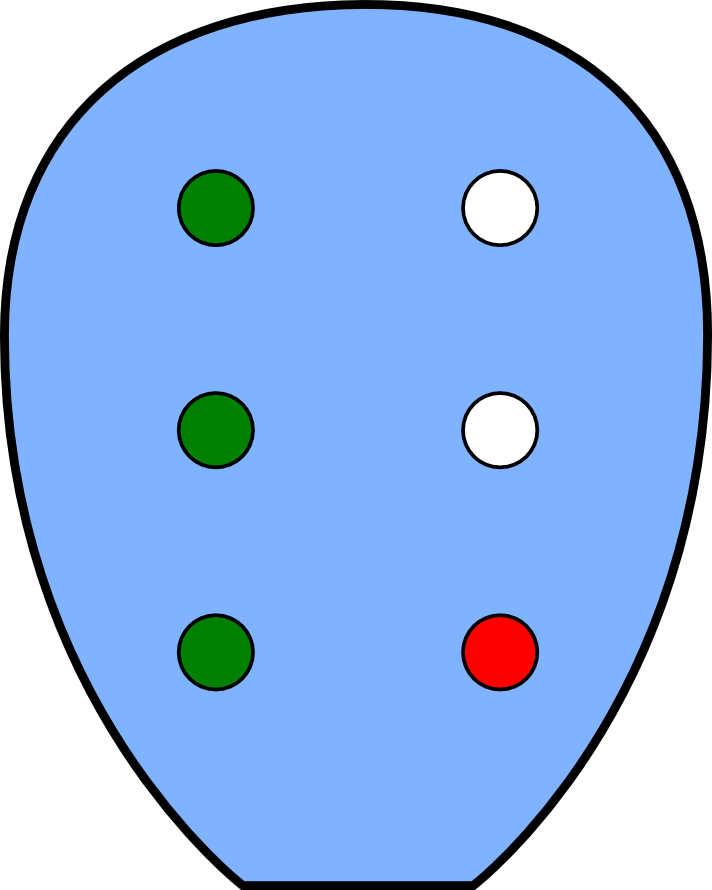
The next step is to tune your Xun. Because Xun's are not supported by the player's lips, it is necessary to always have enough fingers down to support the instrument. This is reflected by the instruments standard fingering system. The index, middle and ring fingers cover holes, while both pinky fingers are left free to support the instrument.
This system uses a total of 8 holes, 6 front holes and 2 thumb holes, offering a total range of 9 diatonic notes. The following chart shows the fingerings for the main octave. You can find a complete Xun finger chart here.
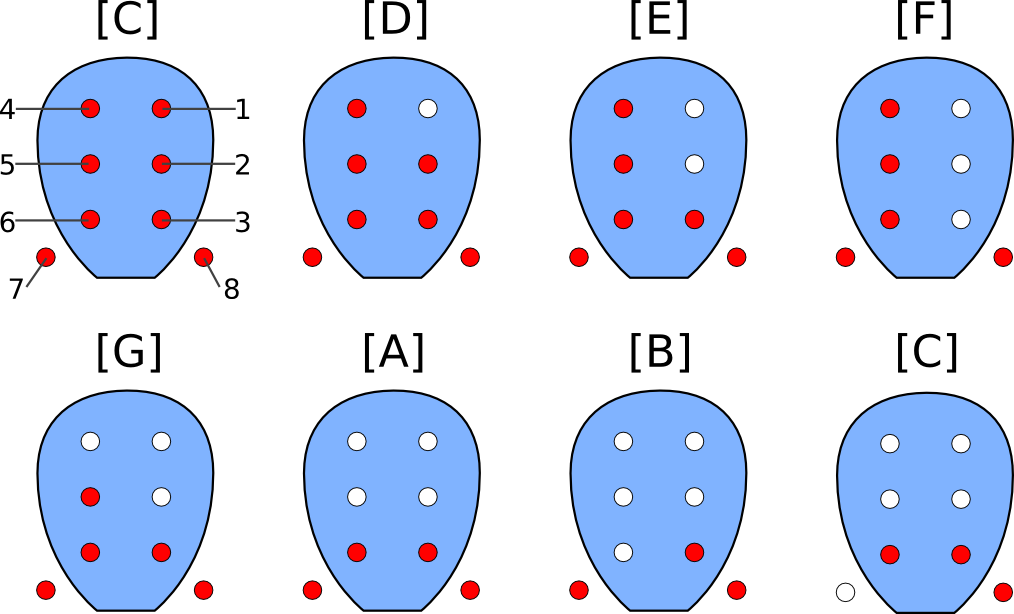
As you can see, these fingerings generally follow a linear pattern, however there are a few exceptions. After 3 of the finger holes are opened the 3rd is closed. This ensures the instrument is always supported.
This system highlights the flexibility which is possible in vessel flute fingering systems. The pitch of a Xun, like that of an ocarina, is controlled by the total area opened by the finger holes, there physical location is mostly unimportant.
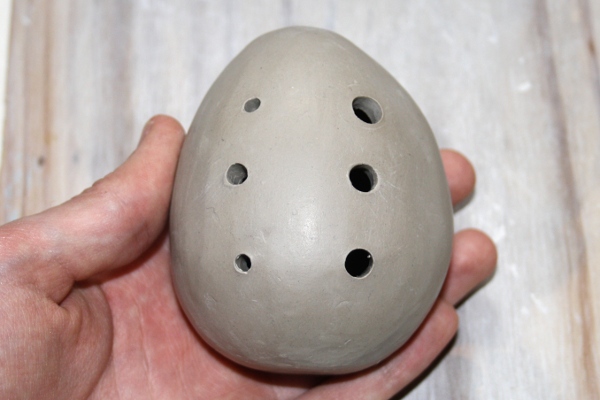
Start by marking the positions of the finger holes. Hold the Xun as you would to play it, then lift your fingers one at a time and mark the positions with a small drill. Just create a light mark on the surface, don't drill out any of the holes.

Step 17
Before you can tune your Xun, you need to find out what key its in. Blow your Xun and find it's lowest note with your tuner, this is the instrument's key. Go to my fingering chart generator, select Xun in the first box, your Xun's key in the second. These are the notes you will tune to.
Step 17
The actual tuning process is a simple matter of opening out holes one at a time using a chromatic tuner to check the pitch.
Then tune your xun following these steps:
Tune holes 1 to 3 (2 to 4 scale degrees) by drilling them out one at a time, checking the pitch with your tuner and adjusting as need be.
Continue this process for holes 4 to 6, but keep hole 3 covered as you open them.
Finally, tune the last two holes while keeping both holes 3 and 6 closed. Opening all the finger holes will give you the highest note.
As you open holes, you will find that it becomes more difficult to get a sound out of your Xun. To keep the instrument playing you need to tighten your embrasure and lower the angle of the air stream and increase your blowing pressure. The latter may be achieved by tilting the Xun towards your torso.
Final notes
Maintaining tuning when working by hand, either with the form and cut method, or wheel throwing requires a great degree of skill witch won't develop overnight. Consequently the easiest way to create Xun's tuned to concert keys is to use a plaster mold. The process of creating and working with molds is in The Art Of Ocarina Making.
As an alternative to the Xun finger system, it is also possible to tune them with the 4 hole ocarina system if you prefer.
4 hole finger chart.